Build a counter with Osprey Native
This tutorial builds Tally, a counter with three buttons, a name field and a day/night switch. You write it once in Osprey, and it opens as a real native app on macOS, iOS, Android and Windows. Each platform draws it with its own buttons, text and fields.
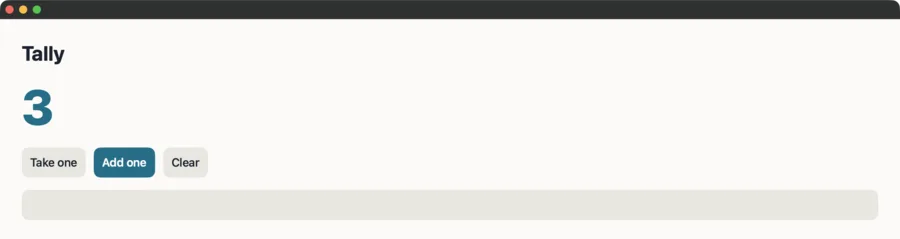
You need a checkout of the Osprey repository and a working build (Install). The finished app is in src/osprey/examples/tally. Every snippet below is copied from it.
How an Osprey Native app works
You only write three things:
- The data your app remembers. For Tally, that is the count, a name and whether night colours are on.
- A view function that turns that data into controls such as text, buttons and fields.
- An update function that takes the data and the button a person tapped, and returns the new data.
The platform does the rest. When someone taps Add one, the host tells your app which button was tapped. Your app runs update, then view, and the host redraws the screen with its own native controls. You never write Swift, Kotlin or C# for this.
The basic controls
Every screen is built from a few controls. Each one becomes the platform's own control. macOS and iOS use SwiftUI. Android uses Android's standard views. Windows uses WinUI.
| Osprey control | What it is | macOS and iOS | Android |
|---|---|---|---|
Column |
Puts its items one below the other | VStack |
vertical LinearLayout |
Across |
Puts its items side by side | HStack |
horizontal LinearLayout |
Wording |
A line of text | Text |
TextView |
Press |
A button that sends an action when tapped | tappable text with your colours | TextView that takes taps |
Typing |
A one-line text field | TextField |
EditText |
Writing |
A text box for several lines | a multi-line editor | EditText |
Switch |
An on/off switch | Toggle |
Switch |
Choosing and Option |
Pick one from a few choices | a row of tappable options | a row of tappable options |
Gap |
Empty space that pushes things apart | Spacer |
Space |
Scrolling |
A column that scrolls | ScrollView |
ScrollView |
Layered |
Items stacked on top of each other | ZStack |
FrameLayout |
Rule |
A thin dividing line | a hairline | a thin View |
Picture |
An image | an image view | ImageView |
There are also Menu, Sheet, Phrase for rich paragraphs and Canvas and Drawing for custom graphics. Tally doesn't need any of them.
Looks: colours, sizes and spacing
Every control takes a look (ui::Look) that sets how it appears:
| Field | Meaning |
|---|---|
ink |
Text colour |
fill |
Background colour; 0 means none |
points |
Text size |
inset |
Padding inside the control |
gap |
Space between the items in a Column or Across |
corner |
Corner rounding |
heft |
Font weight, from 100 (thin) to 900 (black) |
Views::colour "#0B6E8A" turns a web-style colour into the number ink and fill expect. The host has no colours or fonts of its own, so every platform draws exactly the look you wrote.
Step 1: describe the data
Tally can do five things. List them as one type. Each name is an action that a button or field can send:
type Act = Add | Take | Clear | Named | RestyledThen describe everything Tally remembers:
type Counted =
    count : int
    owner : string
    night : bool
Inside module Screen, the app starts from this value:
export first = Counted(count = 0, owner = "", night = false)Step 2: write the update
update takes the current data, the action and any typed text. It returns the new data. store(count = ...) means "the same store, with this one field changed".
lowered count = match count > 0
        true => satSub count 1
        false => 0

    export update (store, action, words) = match action
        Add => store(count = satAdd store.count 1)
        Take => store(count = lowered store.count)
        Clear => store(count = 0)
        Named => store(owner = words)
        Restyled => store(night = store.night == false)
match must cover every action, so the compiler tells you if you add an action and forget to handle it. lowered keeps the count from going below zero. satAdd and satSub stop at the largest and smallest integers instead of wrapping around.
Step 3: draw the screen
view turns the data into controls. It is a plain function: give it the same data and it always returns the same screen.
export view store =
        colours = palette store.night
        ui::Column(columnLook = page colours, columnItems = [
            ui::Wording(wordsLook = title colours, wordsText = heading store),
            ui::Wording(wordsLook = figure colours, wordsText = toString store.count),
            ui::Across(acrossLook = spaced, acrossItems = [
                ui::Press(pressLook = soft colours, pressWords = "Take one", pressAction = Take),
                ui::Press(pressLook = strong colours, pressWords = "Add one", pressAction = Add),
                ui::Press(pressLook = soft colours, pressWords = "Clear", pressAction = Clear),
            ]),
            ui::Typing(typingLook = soft colours, typingText = store.owner, typingAction = Named),
            ui::Gap,
            ui::Press(pressLook = soft colours, pressWords = restyle store, pressAction = Restyled),
        ])
From top to bottom: a title, the count, a row of three buttons, a name field, a gap and the colour button. Each Press names the action it sends. The Typing field sends Named with whatever the person typed.
The title and the colour button change with the data:
heading store = match store.owner
        "" => "Tally"
        owner => "${owner}'s tally"

    restyle store = match store.night
        true => "Use day colours"
        false => "Use night colours"
Step 4: pick the colours
palette picks a set of colours for day or night. Small functions build each look from it:
palette night = match night
        true => Palette(paper = "#10141F", words = "#F2F4FA", accent = "#7AD7F0", onAccent = "#06222B", quiet = "#232A3B")
        false => Palette(paper = "#FBFAF7", words = "#1B2230", accent = "#0B6E8A", onAccent = "#FFFFFF", quiet = "#E8E6E0")

    figure colours = ui::Look(ink = Views::colour colours.accent, fill = 0, points = 72.0, inset = 0.0, gap = 0.0, corner = 0.0, heft = 800)

    strong colours = ui::Look(ink = Views::colour colours.onAccent, fill = Views::colour colours.accent, points = 17.0, inset = 12.0, gap = 0.0, corner = 10.0, heft = 600)
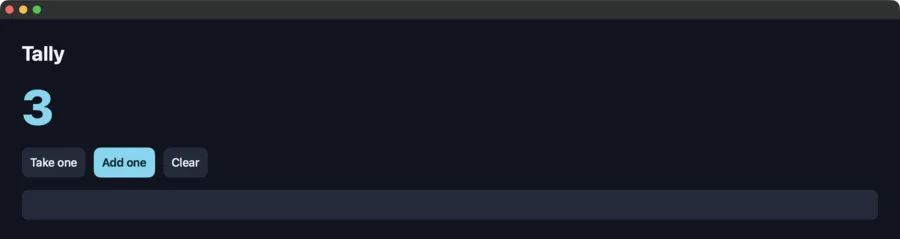
figure makes the count big and bold in the accent colour. strong makes Add one a filled, rounded button. The other looks (page, title, soft and spaced) work the same way; see src/app.ospml. Tapping Use night colours flips night, and the whole screen redraws in the night palette:
Step 5: connect it to the platform
The last file, main.ospml, connects your screen to the platform. It is about 50 lines, and you can copy it unchanged into a new app: only the tally:: names change. It gives the host three entry points:
- argument: receives any launch arguments. Tally ignores them.
- open: draws the first screen from
Screen::first. - event: receives a tap or an edit, runs
Screen::update, then draws the next screen.
The project file lists your source folders and the Osprey Native package:
[project]
name = "tally"
source_roots = ["main.ospml", "src", "../../packages/native/src", "../../packages/graphics/src", "../../packages/json/src"]
default_namespace = "app"
entry = "main.ospml"
To see how that file hands the screen to each platform, read The Osprey Native bridge.
Step 6: test it without a screen
view and update are plain functions, so you can test them without opening a window. test/main.ospml taps buttons in code and checks every control on the screen. Its first test starts like this:
test ("the first view is one column of six controls with five bindings in drawing order", \() =>
    bound = drawn Screen::first
    expect (length bound, 5)
    expect ((at 0).placedLook.inset, 32.0)
    expect ((at 2).placedLook.points, 72.0)
Run the app's tests:
make -C src/toolchain/targets/tests tallyStep 7: run it on each platform
Each command builds Tally and opens it:
make -C src/toolchain/targets/macos tally     # a macOS window
make -C src/toolchain/targets/ios tally       # an iPhone simulator
make -C src/toolchain/targets/android tally   # the Android device named by OSPREY_ANDROID_SERIAL
make -C src/toolchain/targets/windows tally   # a WinUI window, on Windows
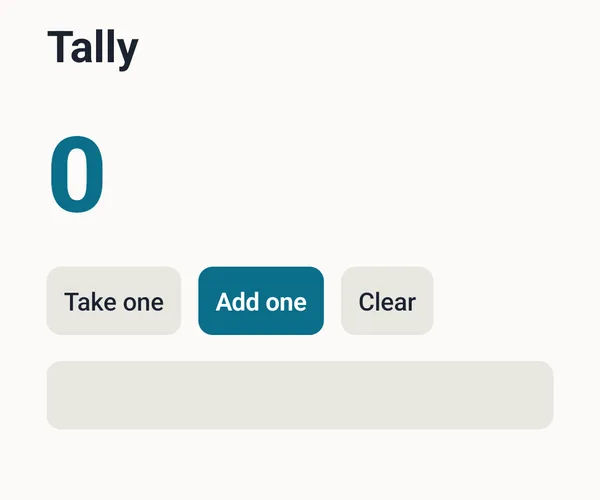
The same Osprey code opens on each platform, drawn with that platform's own controls:
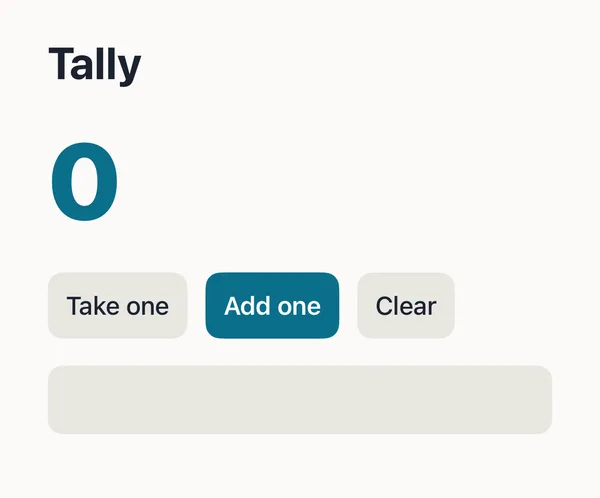
The macOS check opens Tally in a hidden window, taps Add one three times and confirms that the window shows the same thing as a window opened at three:
make -C src/toolchain/targets/macos/tests tally # prints PASSEDMake it yours
Try one change at a time, then run the app again:
- Change
"Add one"to"+1"inview. - Add a
Twiceaction that doubles the count. Add it toAct, give it a line inupdateand add aPressfor it. If you forget the line inupdate, the compiler names the missing case. - Change
accentin the day palette and watch every platform pick up the new colour.
Next: Osprey Native shows larger apps, and The Osprey Native bridge explains how the screen reaches each platform.